
Today was a painful day, our class frog, Leo Don Frog, died. I approached the death of our little frog as an opportunity to instill healthy coping mechanisms, equipping them with a foundation with which to approach similar losses throughout their lives.
When faced with this situation, here are some strategies for turning this sad experience into an important learning opportunity:
Be sensitive to their feelings, and be ready to accept any and all emotions. Some children may voice sadness, while others are more curious. They might ask questions that sound callous– remember that especially if this is their first experience with death, children may have no context for what has happened. Try to get to the bottom of what they’re asking. The permanence of death is hard for young children to understand, and children might ask to see or touch the body to better comprehend. Children will likely ask days, weeks, or months later where the pet is, potentially bringing up that sadness again.
We used the correct terminology by simply stating that Leo Don has died. An accurate and brief explanation helps children understand what has happened. Using phrases like “he’s resting” or “he was sick” can worry children– will they one day rest and not get up? What will happen next time they have a cold or stomach bug? Communicate with families as well. Some families may be less comfortable with these discussions than others, and you’ll likely have a variety of spiritual beliefs within your group. Let families know what you discussed so they can add on their beliefs and reinforce children’s understanding at home.
Grief is a difficult process, but the sense of love in our classroom allows us all to have strength together as we experience the loss. Encouraging and facilitating conversations today was hard but we will hold little frog in our hearts.
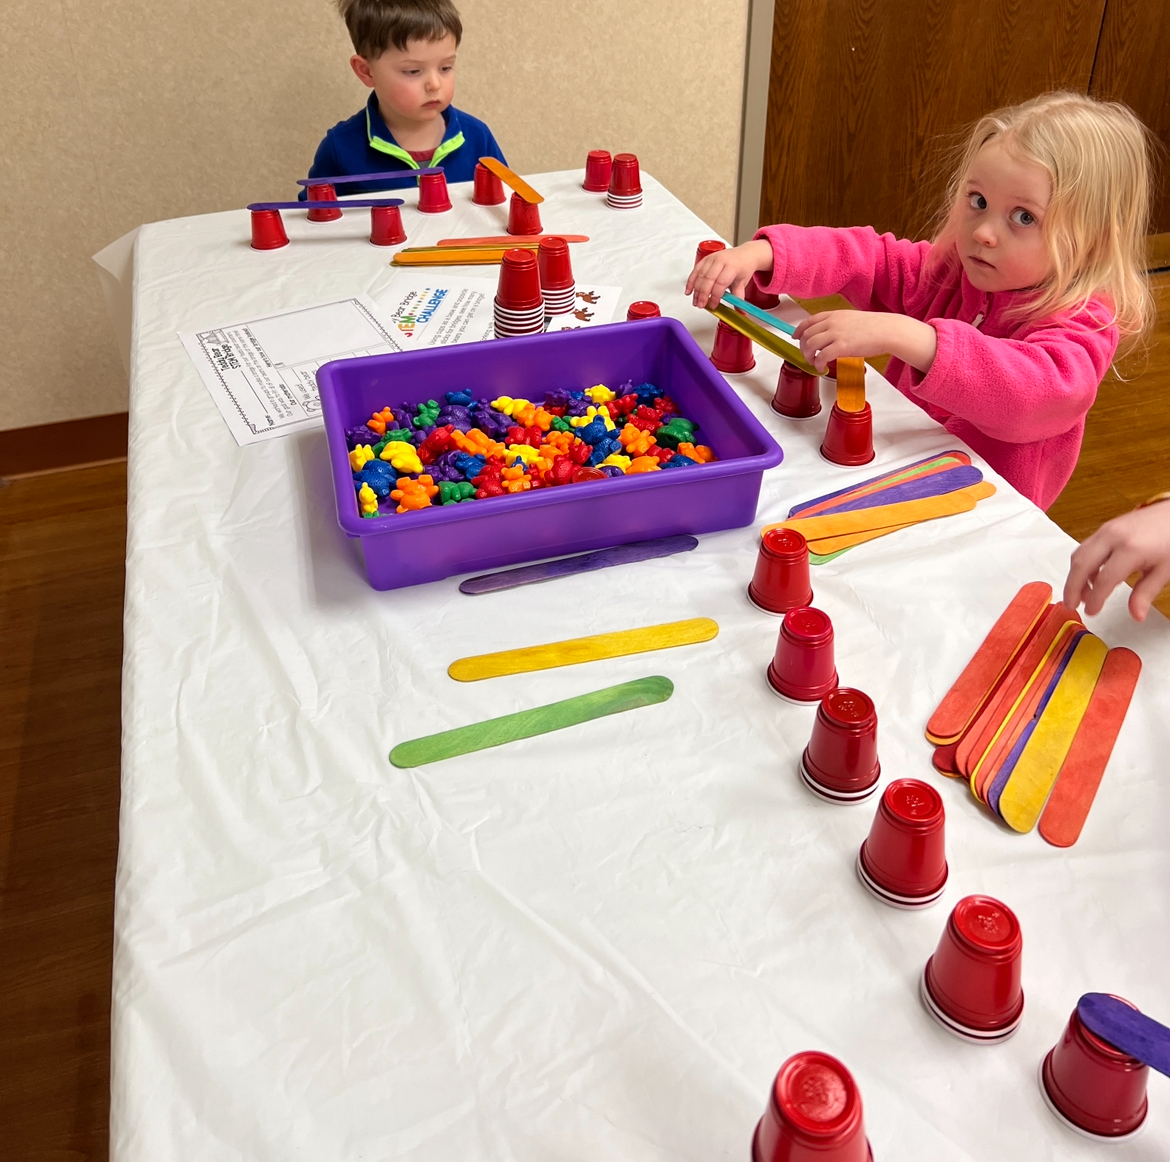
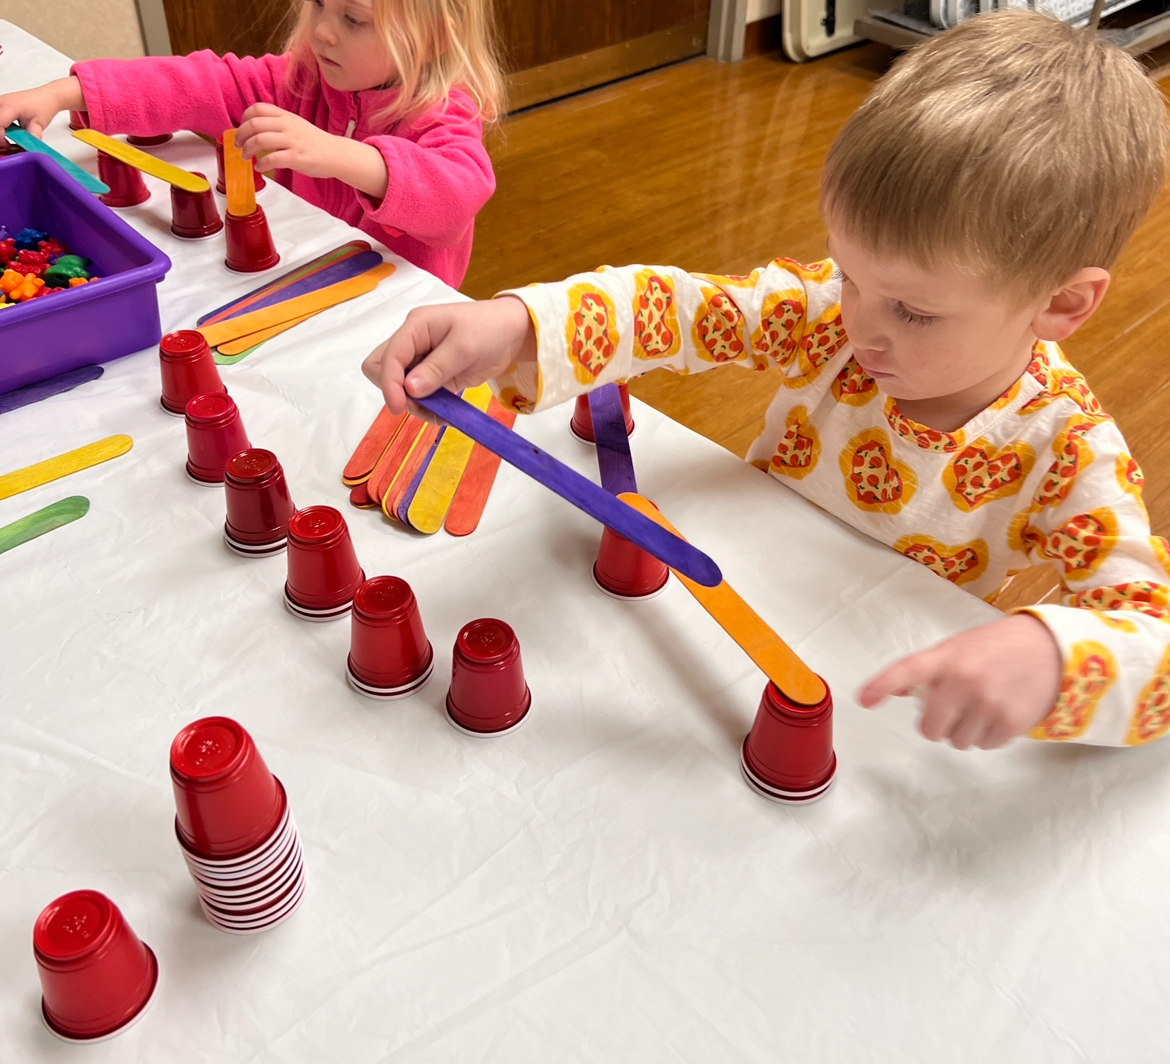
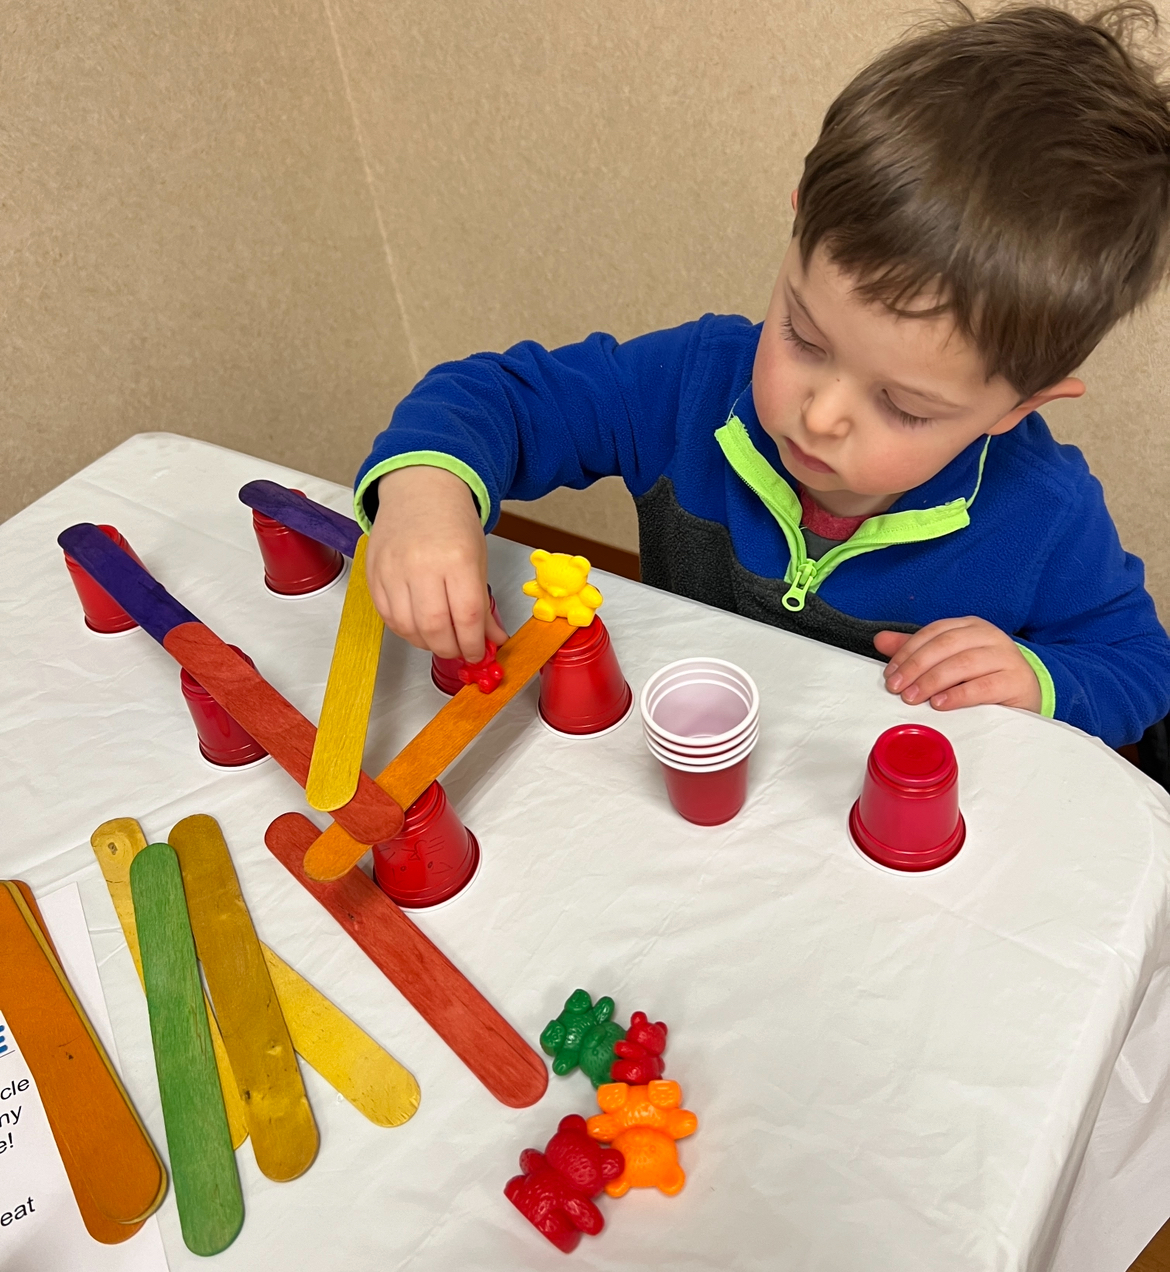
Provider Stephanie McKinstry’s preschoolers arrived one day to a challenge: could they build bridges for bears to cross? How about a bridge big and strong enough for all of their bears to stand on at once?
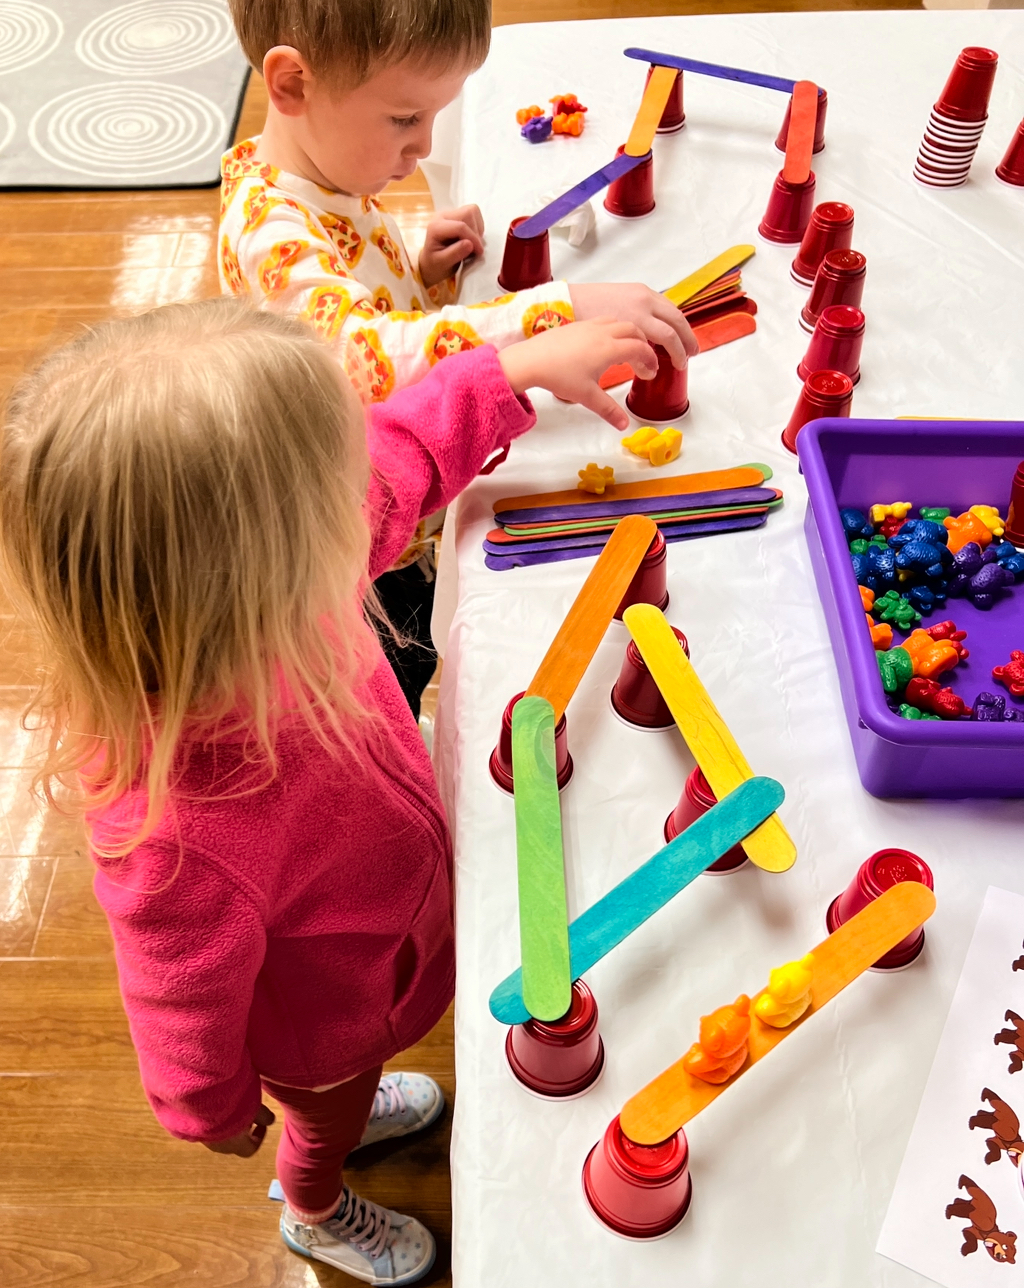
The children got to work constructing their bridges from cups and popsicle sticks, arranging different shapes and patterns.
During construction, some bridge builders sang variations of “Going on a Bear Hunt”, like “Going on a Fish Hunt” because they knew that’s what bears like to eat!
If you want to do this in your own home, you’ll just need the following:
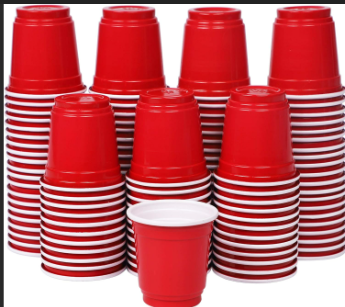


(if you don’t have counting bears, you can use buttons, game pieces, pompoms– really anything that isn’t too tricky to balance!)
Indiana providers: can you spot the Indiana Early Learning Standards being addressed with this activity?
Looking for an interesting textural addition to your play dough? Add birdseed and try this no-cook recipe, written to use with young children. Note: Skip the food coloring you might normally use to allow children to really notice the distinct colors of each type of seed.
- 2 ½ cups All-Purpose Flour
- ¾ cup Salt
- 2 tablespoons Cream Of Tartar
- ¼ cup Vegetable Oil
- 1 ¼ cups Boiling Water
- 2 cups birdseed
- Help children measure the dry ingredients.
- In a large bowl, have each child add an ingredient then take turns whisking together the flour, salt and cream of tartar.
- Adult adds the vegetable oil and boiling water, and using a spatula, mix until combined.
- Once it’s cool enough to handle, bring the children back together to knead the playdough in the bowl until it becomes smooth, about 2 minutes. (It may appear wet at first but will dry as you knead and the water gets fully absorbed.)
- Form the dough into a “bowl” and add birdseed to the center. Help children incorporate the seeds into the dough.
There are lots of common birds in Indiana that stick around for winter. Many of these are colorful favorites that evoke a winter feeling. Our two picks were Cardinals and Blue Jays.
Bird feeders are lively places during the winter months and their presence is important. Feeding winter birds can be a fun and educational activity for kids; they can learn about different species while also learning about their habitats, diets, and winter survival tools.
How We Explored Our Winter Birds:
- Create a bird observation center in your play area by setting up bird feeder stations. You can build your own from recycled materials such as milk cartons, recycled jugs or pinecones or purchase pre-made bird feeders.
- Next decide what type of bird seed you want to use. Investigate what types of food will attract which birds, and offer the children a choice of which they’d like to try– or fill one feeder with one type, and a second with another, and encourage the children to compare which birds they see around each.
- Placing feeders by a window for indoor viewing is an excellent idea for those cold winter days. You can create a chart on a whiteboard or large sheet of paper so they can check off birds they see on it.
- After a few weeks, compile your observations looking for patterns in birds observed at your feeders at different times of the day. Discuss the results.
For more bird-bassed fun, try these:
- Make bird seed play dough for your table activity or sensory table. Try picking up seeds with different shaped tongs and notice which is the most successful for different kinds of seeds.
- Go on a bird feather hunt and research to identify the bird it came from. Record children’s hypotheses and look for a live match!
Fort building is an activity most children enjoy– who wouldn’t love the opportunity to be the architect of their own space? It’s also an incredible way to promote children’s creativity, imagination, persistence, and STEAM skills.
Why is this a STEAM activity?
Science: children need to navigate the physical properties of a variety of materials to make their fort. Will the fabric keep its shape when draped over sticks, or will it fold in ways the children didn’t anticipate? Will rubber bands be strong enough to hold the sticks together, or will they need to use yarn or glue?
Technology: Older children can use rulers, measuring tape, levels, and more tools to help them plan and execute their forts.
Engineering: Structural engineers need to take into account the materials they’re working with when designing structures for an intended purpose. These young engineers will learn the foundational problem-solving skills when the plan and test their designs.
Art: A sense of aesthetics is crucial in fort design! Children can select their color scheme and decor as they assemble.
Math: Geometry is key here, as children figure out how large a space they need to fit the people they would like inside, and measure their sticks and cloth accordingly.
Building outdoor fabric forts promotes play can help children develop problem-solving skills that will help them later in life. Fabric forts don’t always work out the way kids want them to! They teach children to find new and better ways to achieve the result they want.
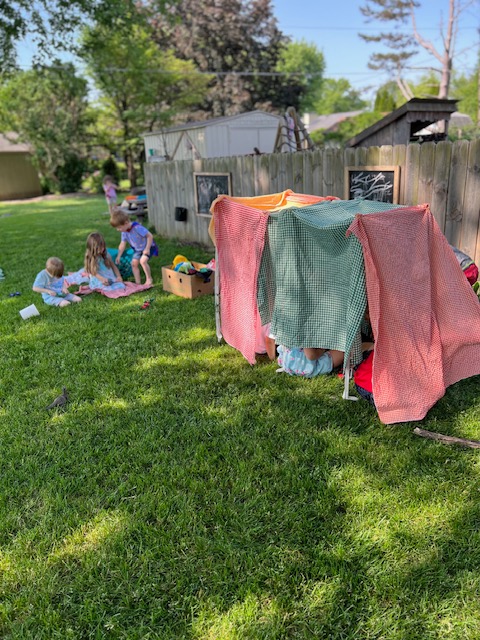
How can you get started? Depending on the ages of the children involved, this activity may use: blankets, tablecloths, sticks, lengths of PVC pipe, yarn, glue, paper, rubber bands, and all kinds of other “stuff” that you have on hand!
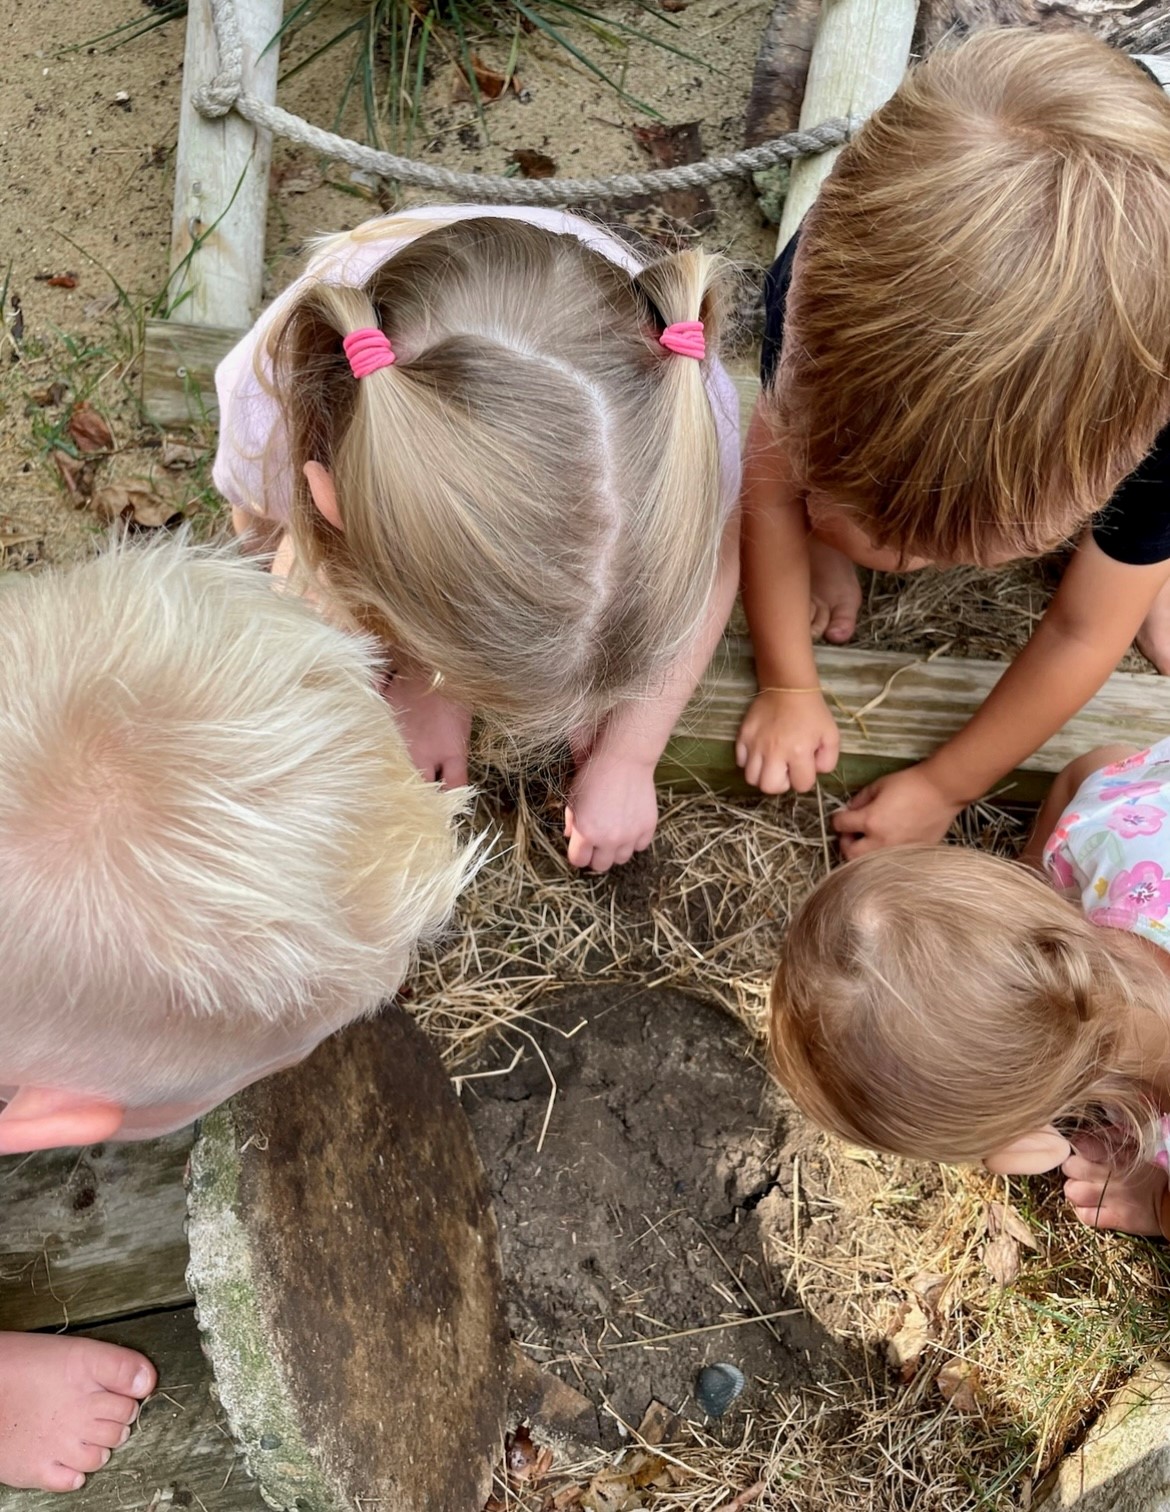
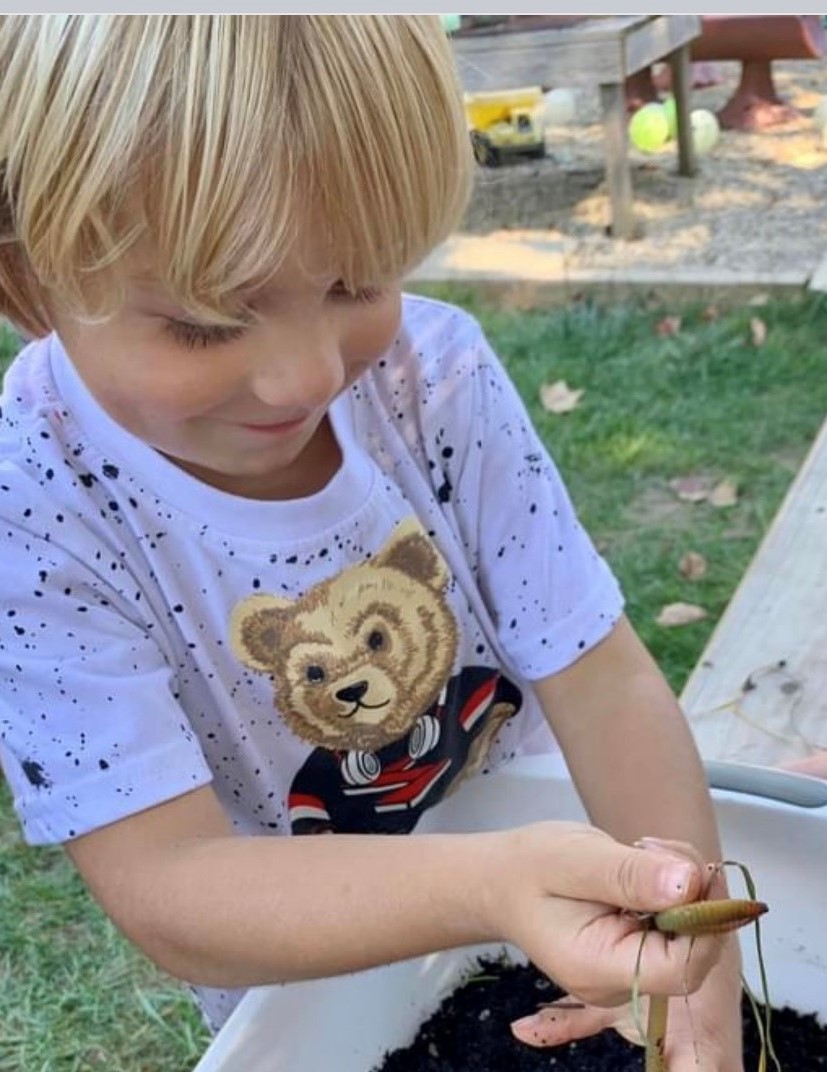
One of our favorite and must exciting activities is exploring worms. To start, we first figure out where worms live; often, children have seen worms out on the sidewalk or crawling on dirt and have a good idea of where to search for more. Exploring all the places in our outdoor space where they can live—asking children where they saw them and where they could have crawled under. By taking on this approach to finding the worms, we set the groundwork to learn more about worms’ habitat. Plus, it is fun to look for clues.
Once we decide where to look, the fun and messy part starts, children can use their hands, or I provide shovels so they can dig in the dirt. Figuring out what children are comfortable with is key; some will love to touch the dirt, while others may not want to. The same can be said for when we find a worm. Some children are curious and want to pick them up immediately. Others may want to see them from afar. We give children space and allow them to go at their own pace in the exploration.
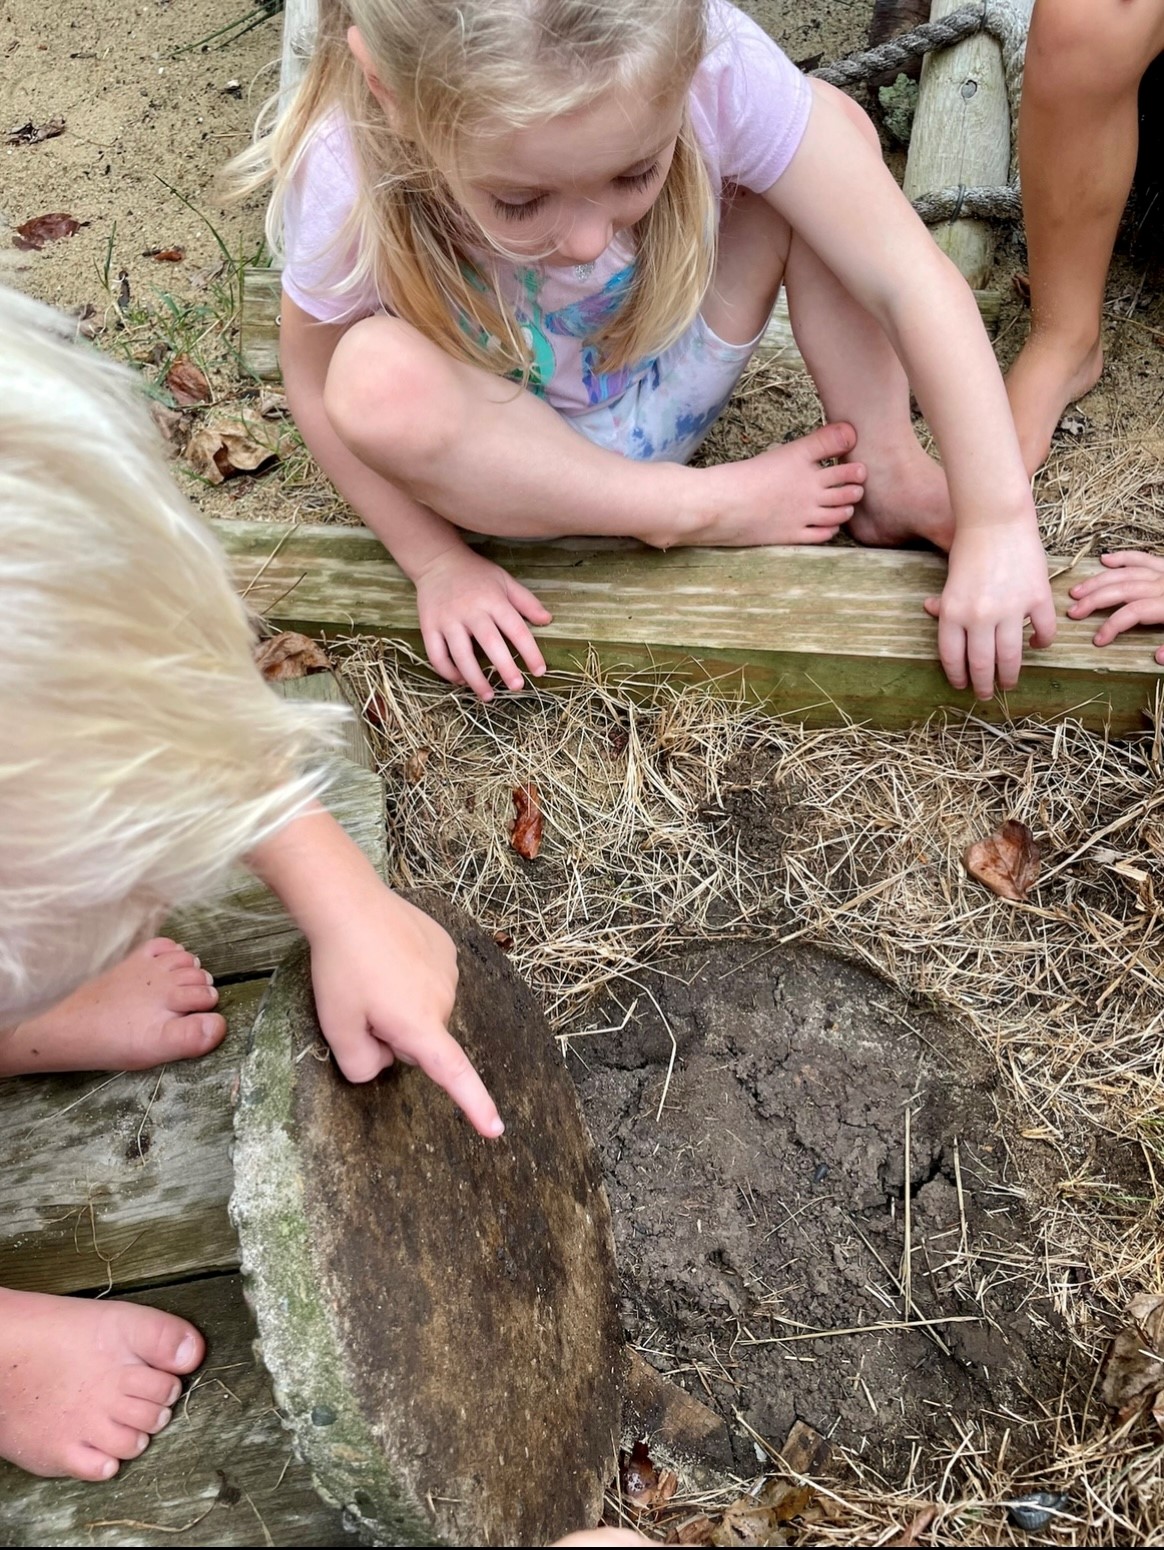
If they are touching the worm, we talk about kindness, responsibility, respect, and compassion for the worm. Years ago, when we saw a worm or bug, I would immediately say, “look with your eyes, we might scare it or hurt it”. Over time I have learned the importance of having children experience holding insects, animals, and materials. I had to shift my thinking, and instead of avoiding the touching. I began to trust the children. Talking with them about how we treat animals and how we want to make sure we are caring for nature. Allowing them to take responsibility and feel proud of how they care for others helps them develop a great sense of self.
Stephanie Mckinstry from My Caterpillar Clubhouse, a Certified Nature Explore Classroom, shares how she incorporating books and images of nature into her program. Listen below for her tips.
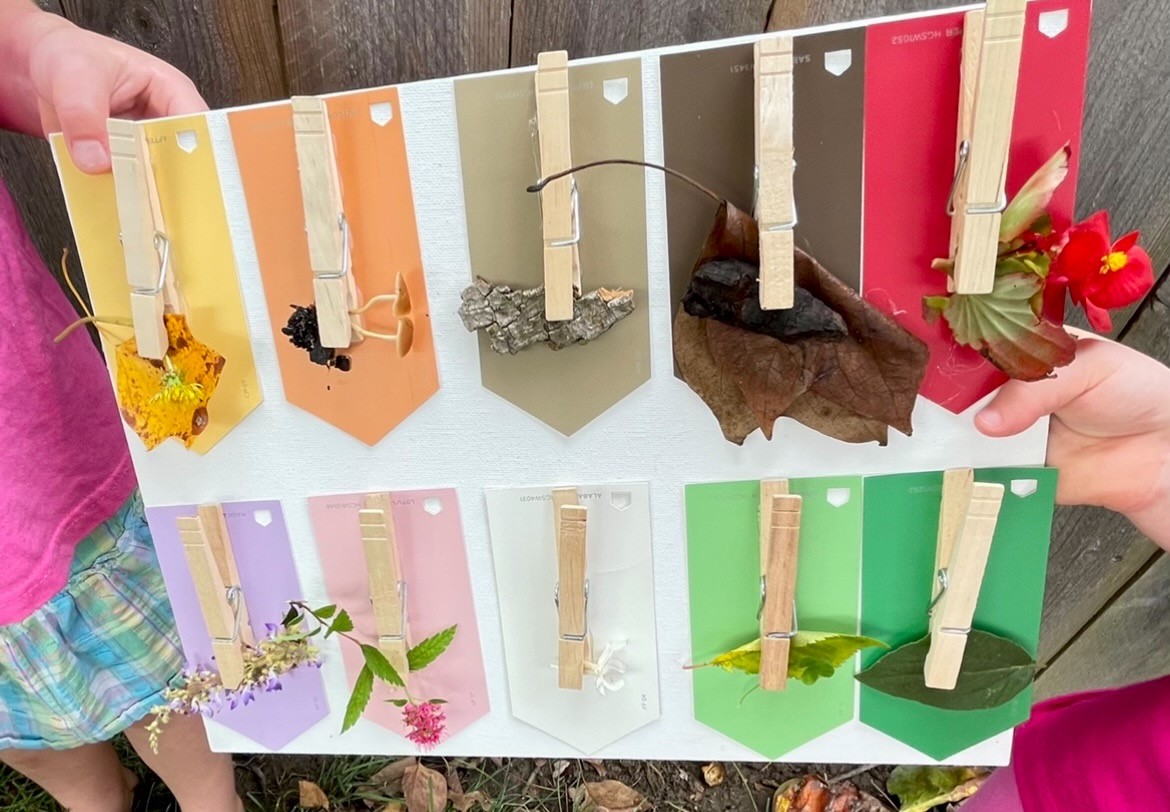
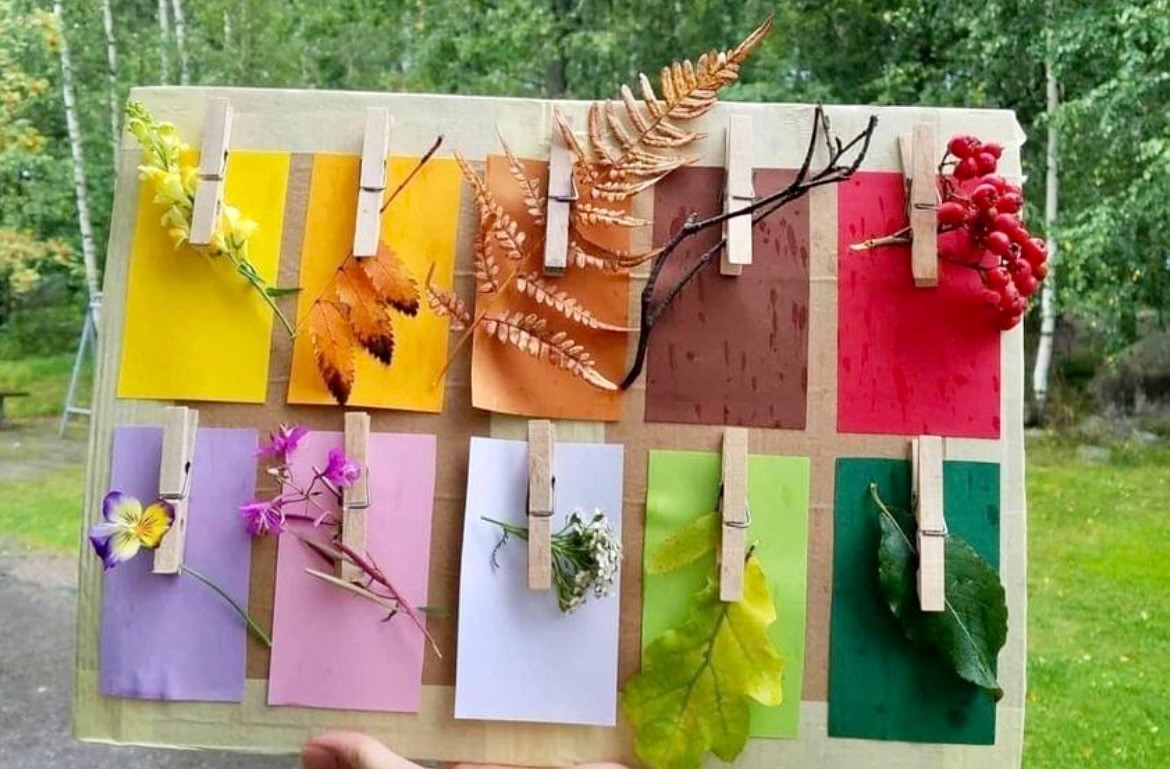
Creating a nature scavenger color-hunt game is a fun nature-themed activity to get your group outdoors. This is an activity that, no matter their age, they will stay busy and observe as they play creatively and explore outside.
You can use a canvas panel or a piece of cardboard, I would say roughly the size of a medium-large pizza box. You then want to take 10 color paint swatches. I like to take a walk in my space and quickly take 10 pictures to match when I get to my hardware store. This is something that will, of course, change with the seasons.
We did 10 colors; my group is 2.5-4 years old. It’s entirely up to you how you choose to do this; you can cut smaller pieces of cardboard and give each child 5 colors; you can do it as a group as we did. You can add shapes by cutting the paint sample into a circle or triangle. You can also use this as a take-home activity for family engagement. Ask families to bring it back and discuss it with the group.
So after you have the canvas panel or cardboard, the color swatches, and 10 clothespins, you want to hot glue the colors swatches down and the clothespins. Then go explore for colors!
You can set rules for the game, like the color green can not be grass. Once the child finds the color, they yell “I found yellow”, clip it, and attach it to the board. We display our board and showcase it for pick up. Children are always so proud to name what they found and the color it matches.
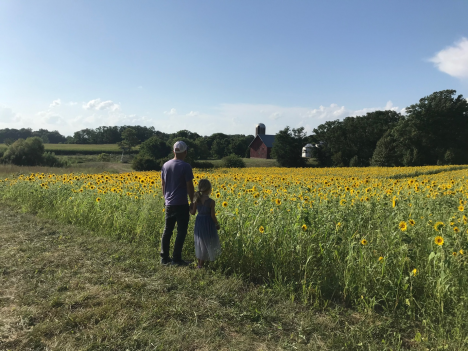
August and September are big Sunflower months around here. If you happen to put sunflowers in your bird feeders, you likely have sunflowers all over, even some in strange places.I like to let most of my sunflowers live their long lives, but every once in awhile one pops up somewhere and I have to pluck it out. Also, at some point they all die off, and they can be quite unsightly. Instead of just composting the giants, I try to use these opportunities as teachable moments. Here are a few activities you can do with sunflowers.
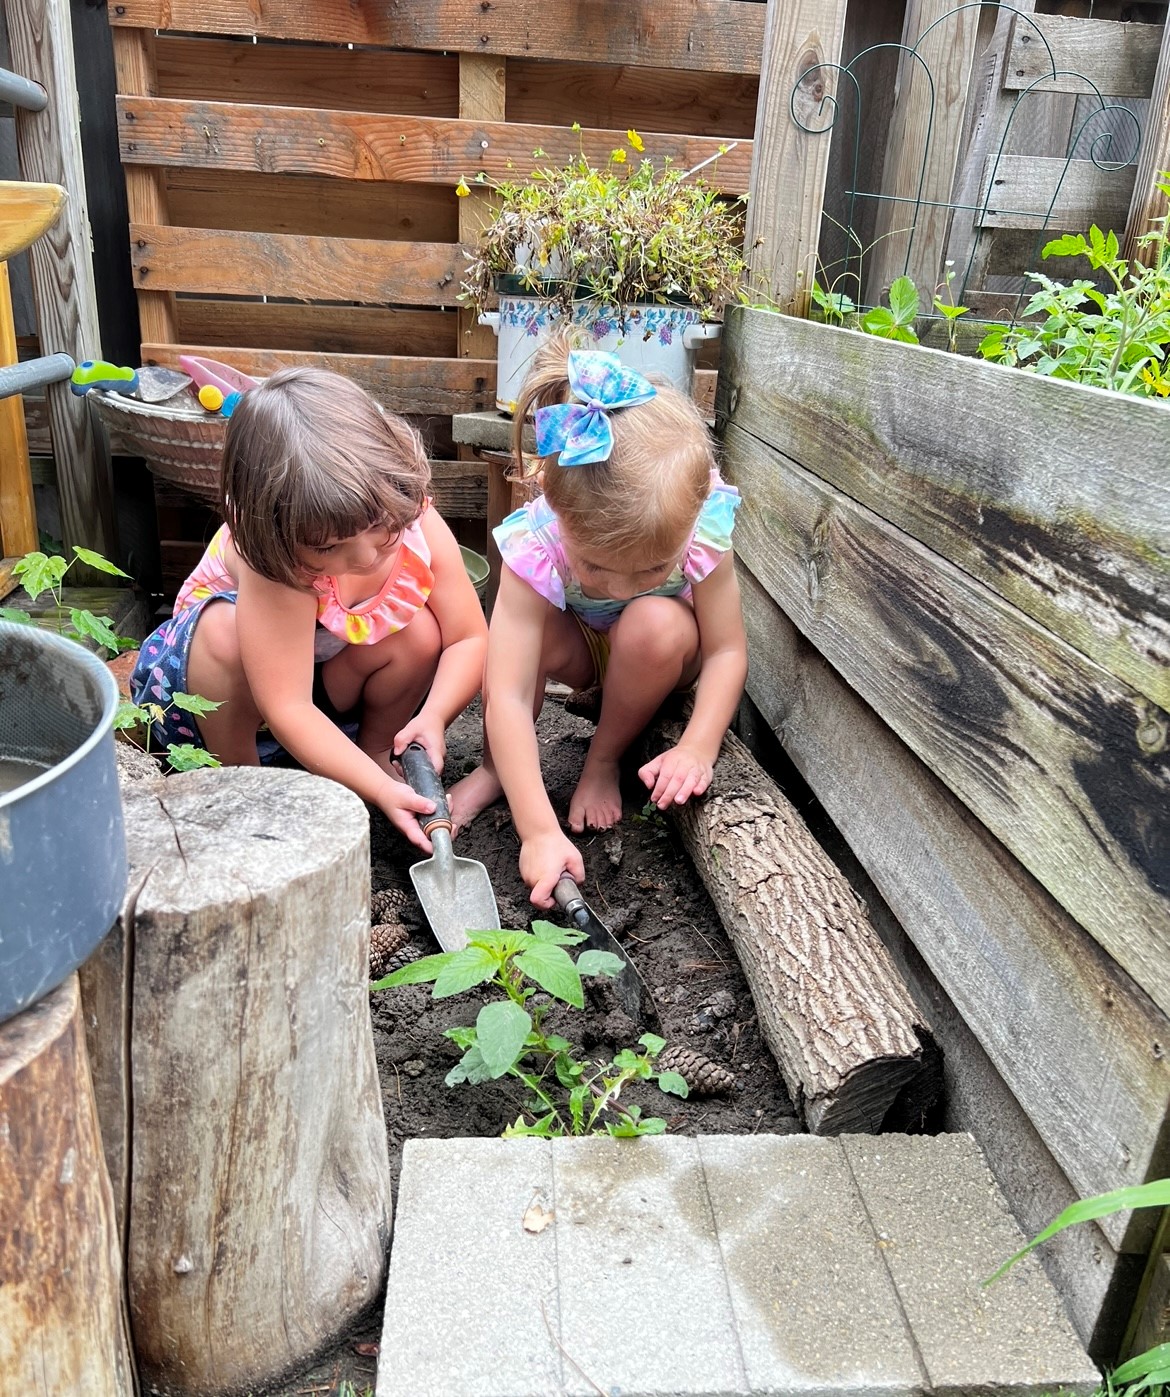
Weeding/ Ages 3-99
Engage children in assisting in the removal process. Weeding requires a lot of gross motor skills. Using several muscles in unison, and stimulating brain activity. Children enjoy the satisfaction of pulling as hard as they can, and it’s great for them to see the progress of their efforts. Once pulled, help them remove the stem, the leaves, and the flower, and place the different parts into labeled bins to explore next.
Sunflower exploration/ Ages 0 – 99 / Fine motor skills, Scientific knowledge/ Math
Offer sunflowers to children with a variety of tools such as plastic knives, mallet, tweezers, water, different containers. Encourage the children to explore the sunflowers using the tools. Offer some safety guidelines if necessary. Then, let them go at it! As they are exploring you can scaffold their learning by asking questions or offering new techniques.
Sunflower painting / Ages 1 – 99 / Fine motor skills/ Creative Arts/ Early Math / Science
Create the art area by laying down an old sheet on the grass. Offer each child a canvas and a sunflower. Squirt desired colors of paint on canvas and encourage children to use their sunflower or hands to paint.
Seed counting / 2 -99 / Math
Use tweezers or fingers to extract seeds from flower head. This process alone is really cool! The textures of the sunflower are varied and interesting. Count seeds by 1’s, 5’s, and 10’s! Make up a recipe “We need 30 seeds to bake our bread!”
Cooking! / 2 -99
After you have counted, painted, smashed, and tweezed the sunflower pieces, cook with them! Flower petals look gorgeous on a mud pie, and children will love having new textures to work with.
![]()
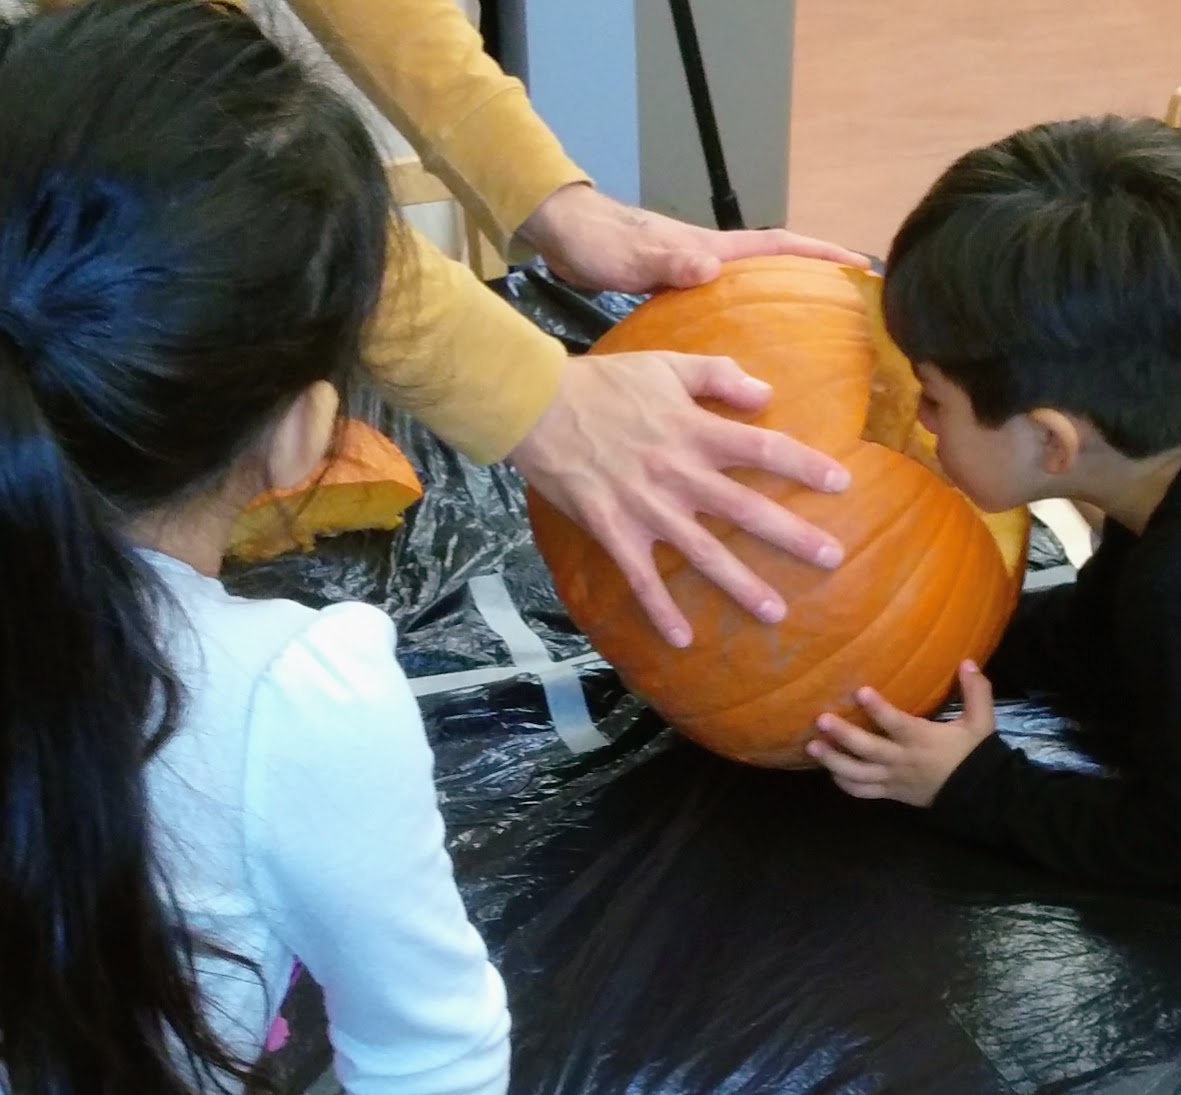
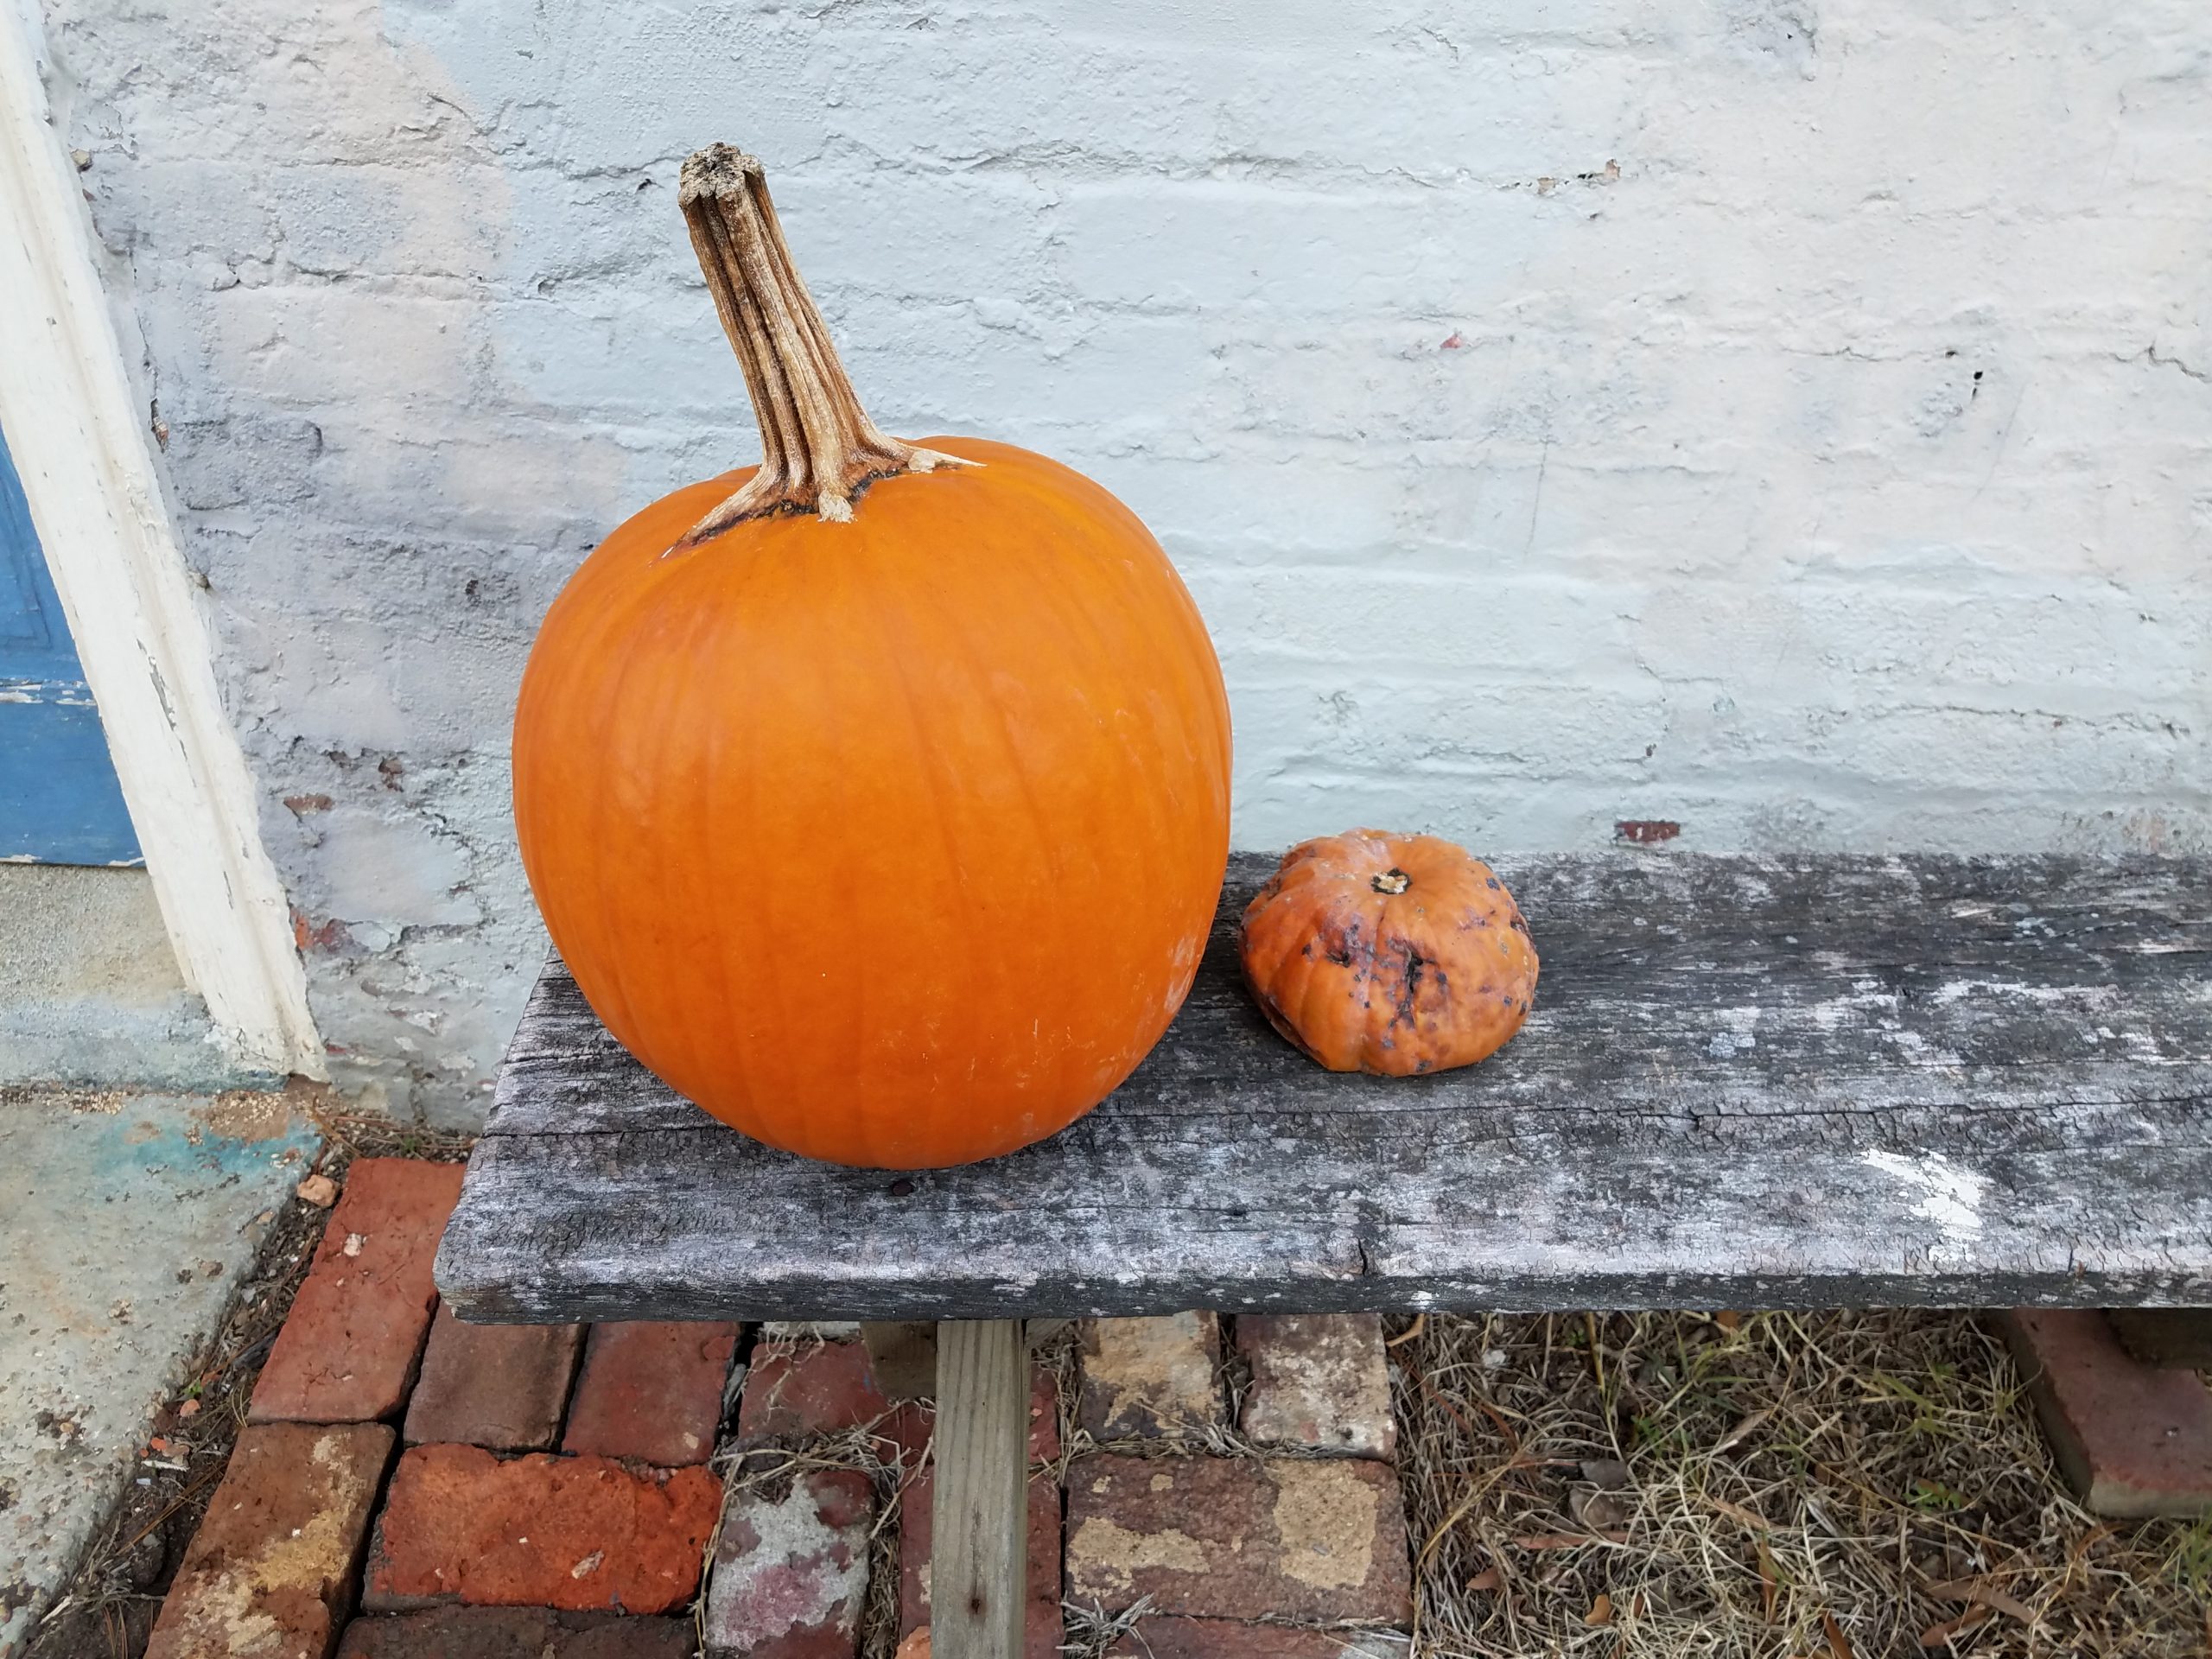
We are officially in Autumn, and of course, with this season comes pumpkins! Here are few ideas on how to explore pumpkins in your program:
- Explore the outside of the pumpkin!
*Have children touch the shell and stem
How does it feels? Is it smooth, bumpy, hard?
What do you see?
What sound does it make?
What color is it?
Why does it have a stem?
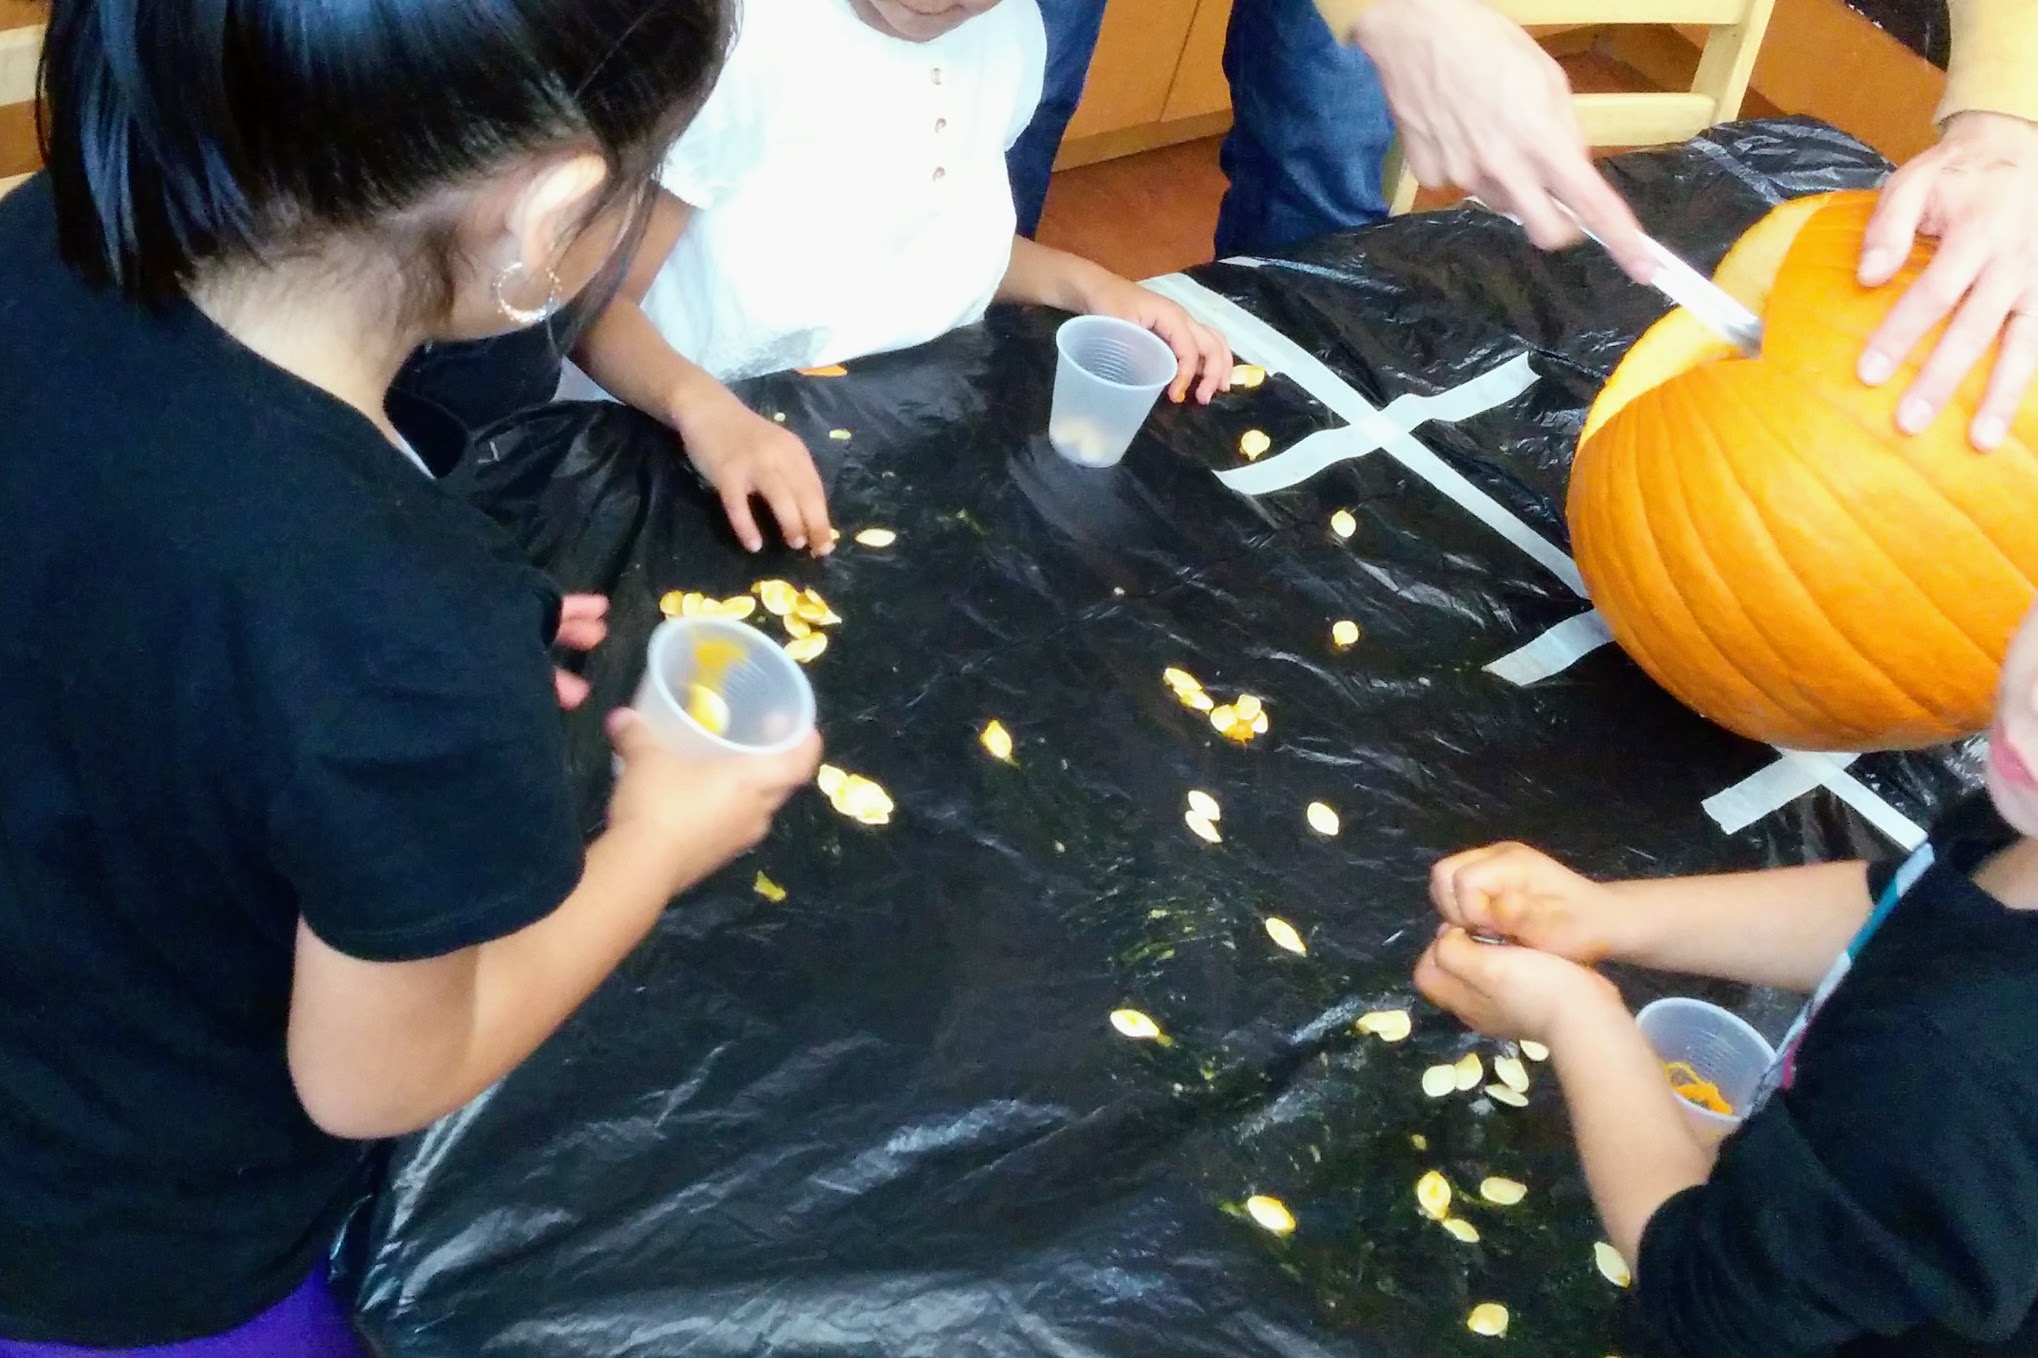
- Explore the inside of the pumpkin!
*After exploring the outside, move to the inside. Carve out the stem and ask children to look inside, describing what they see. If they are comfortable, have them touch the inside, feel the pulp and seeds, describing this texture. Dig into the pulp and seeds by using a spoon to scoop it out. Ask children:
How does it feel?
What does it smell like?
What color is it?
What shape is it?
*For infants or children who are overstimulated with touching the raw pumpkin pulp, scoop the pulp and seeds in a freezer bag, glue the bag shut, and have them squish the bag
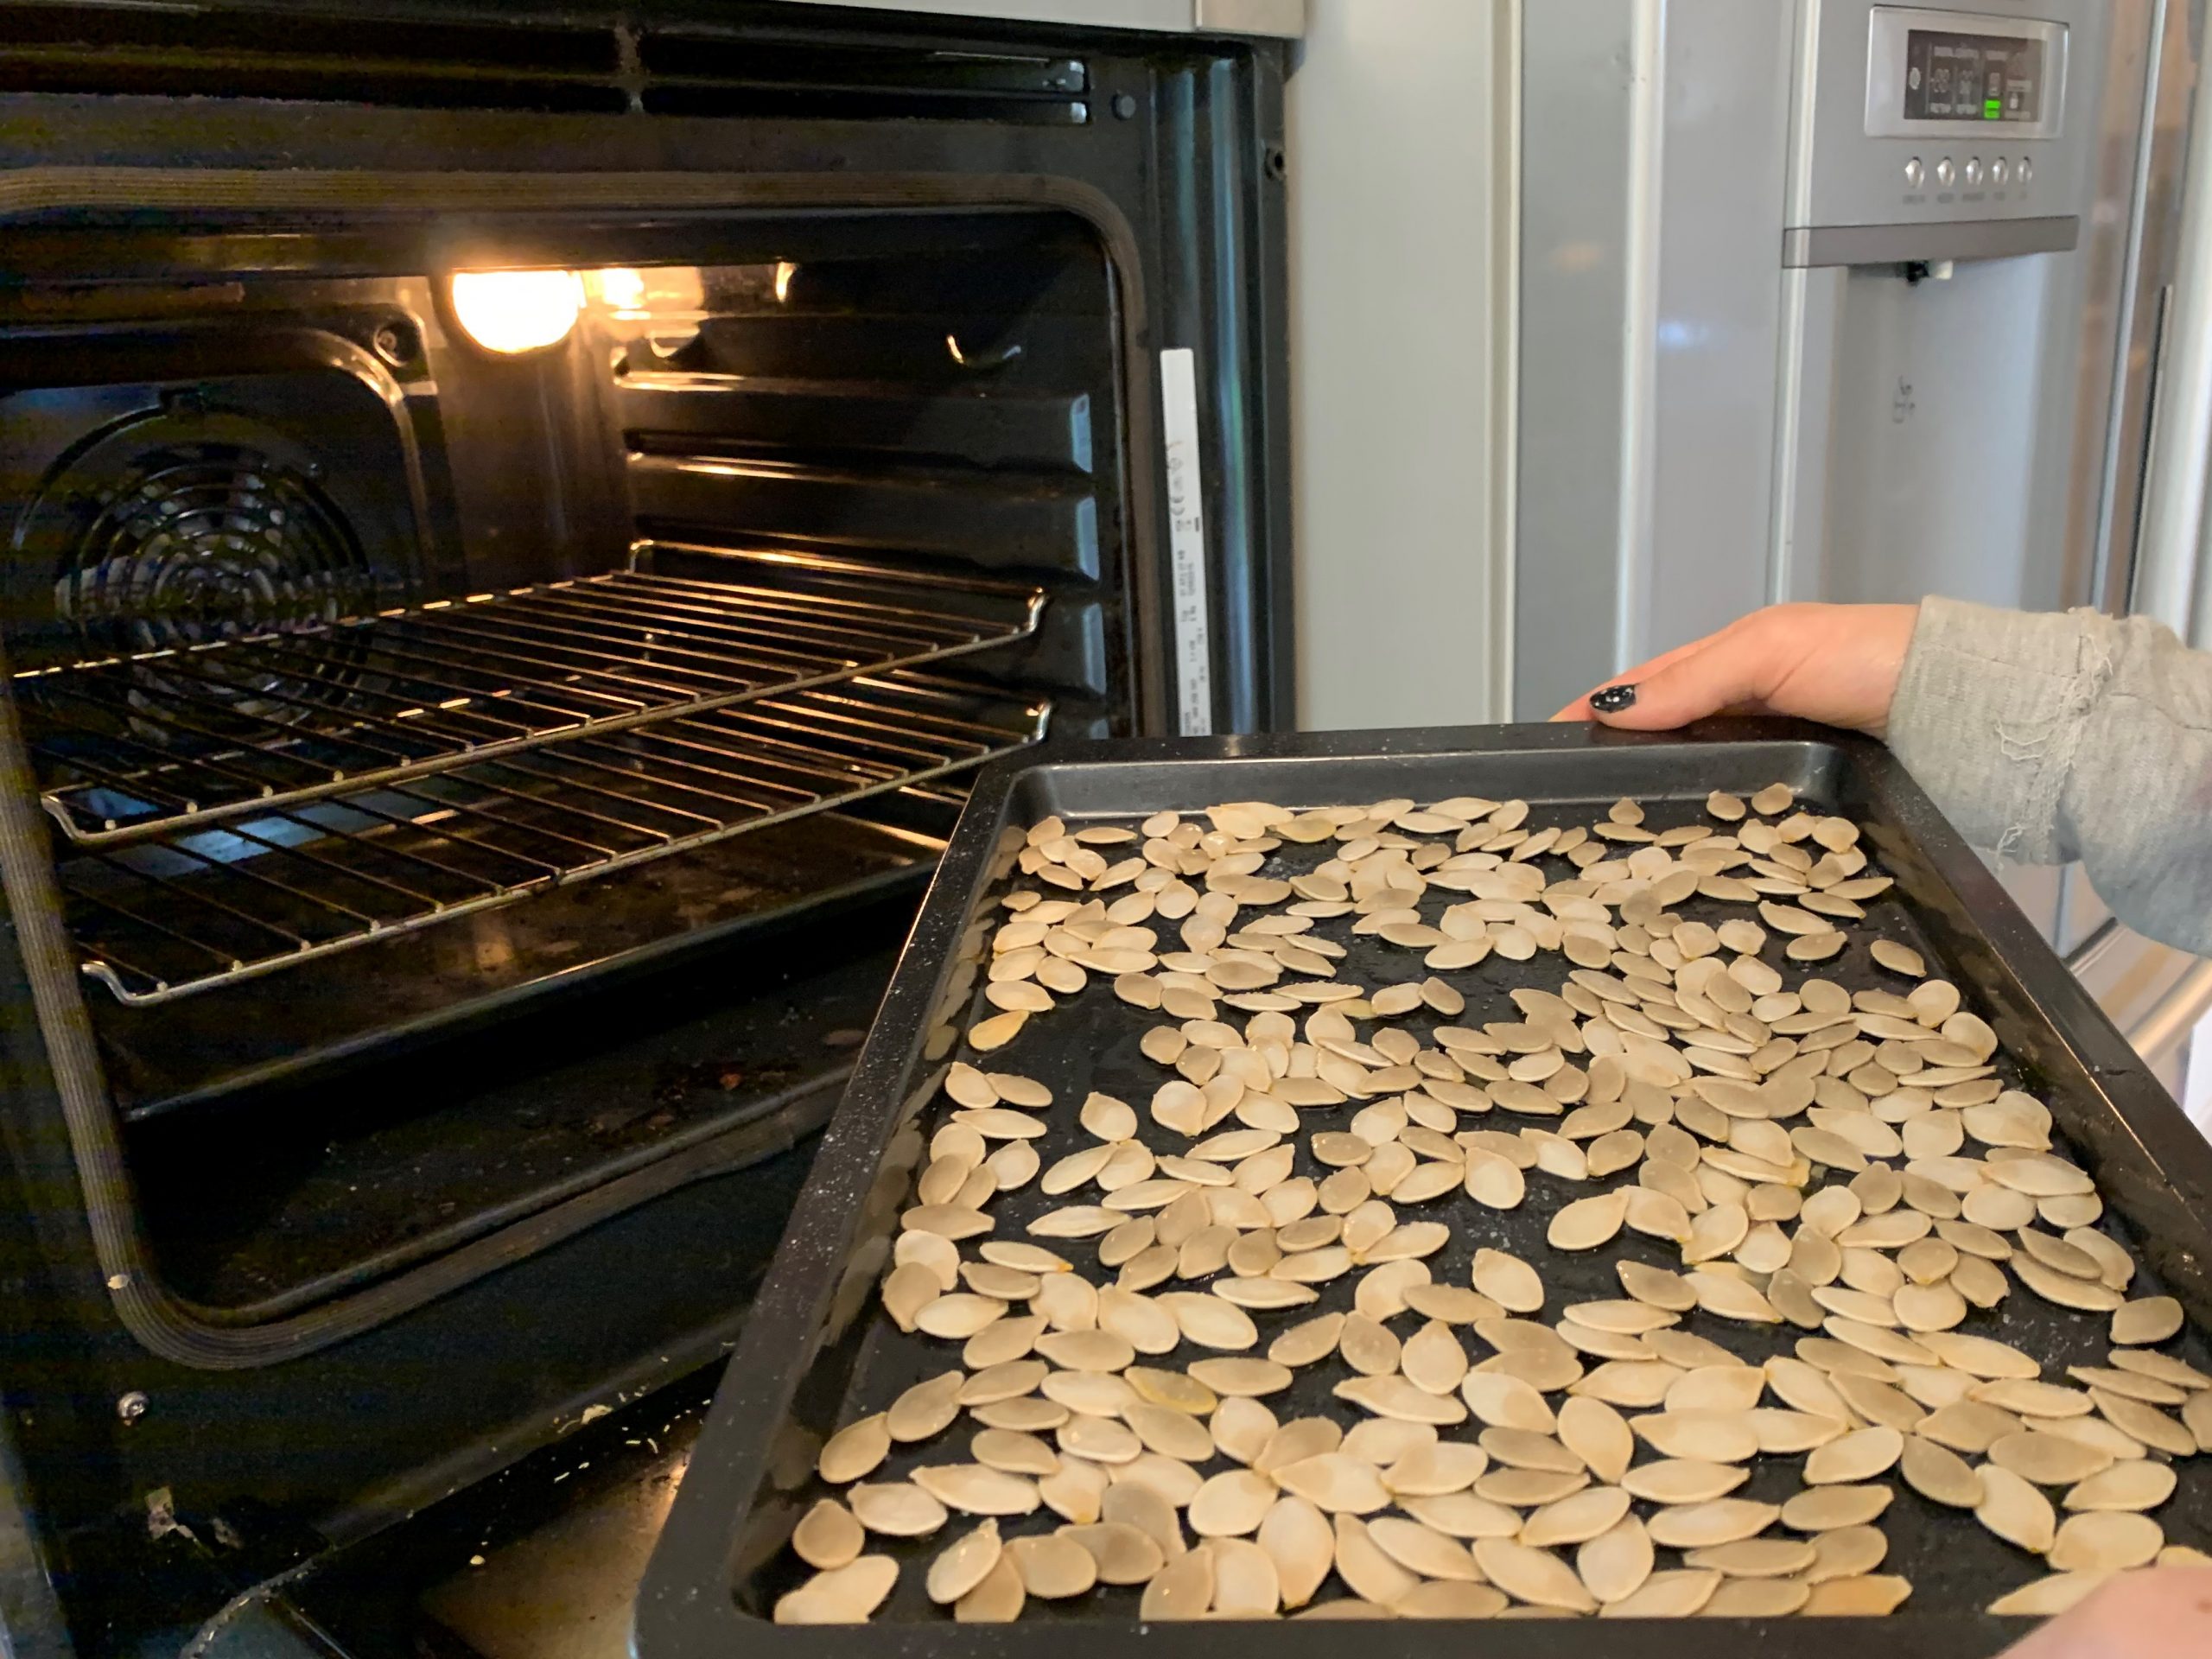
*With the pulp and seeds out, have the children separate the seeds from the pulp. As an added activity, have them count how many seeds they found
- Explore what happens after!
*Leave your pumpkin in a safe place inside or outside to observe the daily changes
*Ask children to notice the difference in color, texture, and smell
*Why is the pumpkin changing?
- Exploring taste!
* Rinse the seeds and lay them out to dry. Once dry, place them on a cookie sheet to roast. Have older children taste them (safety precaution choking hazard)
*Explore a pie pumpkin instead of a carving pumpkin, bake the pumpkin and have children try the pulp or use it to make a pie or cookies
Have a fun Autumn activity? Share your ideas with us at info@townsquarecentral.org